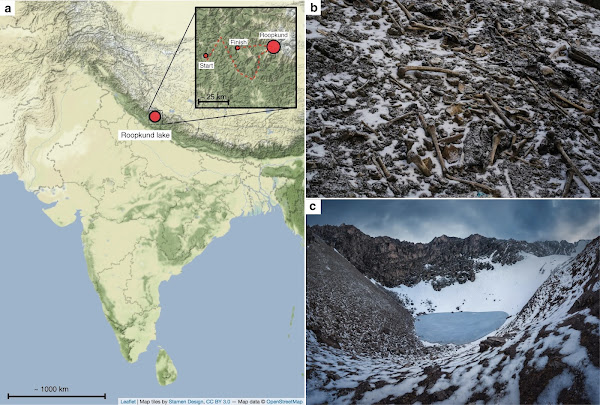
In 2019, a paper1 was published with the analysis of the remains of 38 individuals whose bones were found in Roopkund lake, Uttarakhand at an altitude of 5000m above sea level.
Showing posts with label qpAdm. Show all posts
Monday, December 20, 2021
Wednesday, November 17, 2021
Integrating raw DNA data into aDna database for use in Admixtools
| Representative example of a user's data being merged into Eigenstrat format for Admixtools |
I could possibly do it for 2-3 people a day. In case some people don't have linux or don't want the hassle of running the programs themselves, I could even run 4-5 models suggested by them for a fee.
Let me know in the poll and also the comments if its something you guys will be interested in. With the virus lockdown affecting my business sector, I have got some extra time on my hands.
Update:
Since I already have 2-3 people wanting their data merged and get the eigenstrat file for personal use, I have decided to go ahead and open it up for all.
Thursday, November 11, 2021
HOW TO Part 2:: How to test models using qpAdm - qpAdm 101
qpAdm is used to validate models that are fed into it by the user. The details that need to passed to the qpAdm program are as follows.
- Target population
- List of 2 or more source populations
- List of Right populations or Right Pops.
- The populations in 1 & 2 are together called Left Populations or Left Pops and the first population in this list is considered as target population by qpAdm.
- The first population among the right pops has to be a basal population (Outgroup) and usually an african population like Mbuti, ShumLaka or Mota etc is chosen for this purpose.
A standard example of a qpAdm model is
Target population (Target) = source population 1 (Source 1) + source population 2 (Source 2)
The qpAdm output will contain a p-value (also called tail probability or tailprob), admixture coefficients x & y for Source1 and Source2 respectively such that x+y = 1 (or 100%) and standard errors for those coefficients.
Monday, November 8, 2021
Stepwise tutorial to Install Admixtools & Plink
I will make 3 separate posts on how to install Admixtools, run qpAdm and run qpGraph respectively. This first blog post will detail steps to successfully install Admixtools by Harvard lab.
STEP 1. Have a Linux system
Admixtools cannot be run from a Windows system. If you have a Windows or MacOS Host system, install Oracle VirtualBox from here. Its free.
Install any Guest linux system on this VBox. I use OpenSuse Leap v15.1 for no particular reason apart from that I'm used to it. The virtual image for installation can be downloaded for free from here.
Once this is done, install the guest Linux system on the VBOX. This video below can guide you.
In the Virtual box settings (can only edit it when Guest OS is shut down), make sure to use 2 processors, 3d acceleration enabled in display settings and I would suggest using 4GB RAM. Use VBoxSVGA as Graphics controller in display settings so that you can get full screen display in guest OS.
Subscribe to:
Posts (Atom)